![]()
|
The fit-out at Sandhills Narrowboats Limited to Launch
[10 May 2006 - 11 December 2006] Click on any of the thumbnails for a higher resolution
image. All pictures Copyright © 2005 - 2006
C J Wells |
|
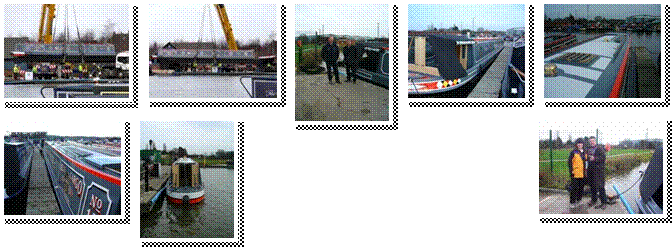
BELLE is
launched 11 December 2006 A few pictures of the launch at Barton Turns Marina - as
we left today, the lads (Mark to the left and Gary to the right) had set
about making some slight adjustments to the ballast so that BELLE sits
properly in the water. Thereafter
they will lay the final flooring, attend to a few other minor jobs on board
and then she is ours. Thanks to Grey Nomad for the pictures of BELLE on the
crane. More pictures to come soon – including some of the
interior after handover next weekend. |
|
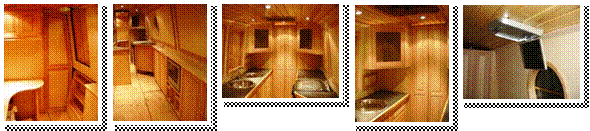
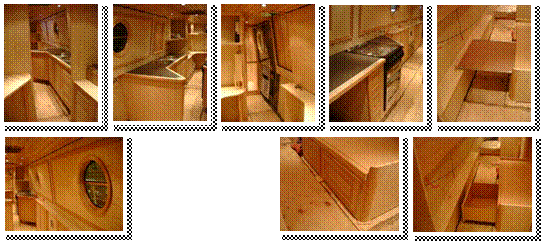
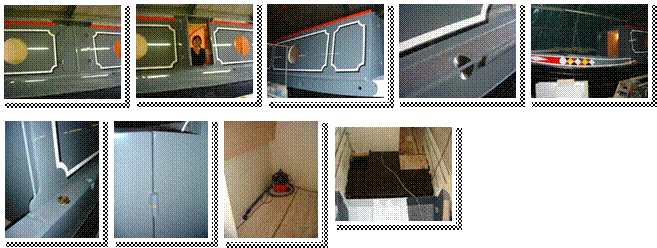
Some general
shots of the Day Room / Saloon / Galley 18 November 2006 From left to right ● view from galley into day room
showing side door steps and bathroom door ● view into saloon showing
new flat screen TV ● view into galley from saloon ● closer shot
of the high-level cupboards in the galley (glass panelled doors) ● TV
mounted to the ceiling in the bedroom More to come soon. |
|
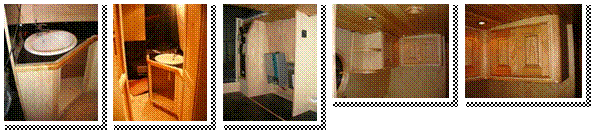
More work
completed in the Bathroom / Utility Room and Day Room 28 October 2006 A few selected photographs showing – left to right ●
vanity unit taking shape in the bathroom (just needs a door) ●
electrical equipment cupboard / control arrangement taking shape in the
utility room / stern (needs a shelf and doors – instrument panel being
fitted now) ● high-level cupboard nearly finished in the day room (just
needs handles). More to come soon. |
|
Some more
general shots of the Saloon / Galley / Bedroom / Bathroom 14 October 2006 A few selected photographs showing – starting from
top left and going clockwise ● view into the galley from the day room ●
view into the galley from the saloon ● view into the bathroom from the
day room ● another view into the galley from day room ● view of
one of the two sliding portions at the foot of the cross-over bed (together
they both support the lower ‘third’ of the mattress) ● two
views of one of the two deep drawers at the foot of the cross-over bed ●
view into the saloon from the bow doors More to come soon. |
|
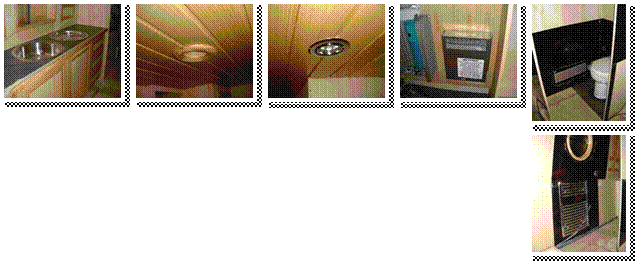
Miscellaneous
features 05 October 2006 A few selected photographs showing – starting from
top left and going clockwise ● one of the galley work units, now nearly
finished (just needs taps and handles for the cupboards / drawers) ●
mushroom vent liners (now installed in all of the rooms) ● typical
chrome finish ceiling light (now installed in all of the rooms) ● TravelPower control unit (just needs wiring in) ● Mastervolt inverter / charger unit (just needs wiring in)
● examples of the black laminate fixed to some of the walls in the
toilet and bathroom areas ● chromed towel rail in the bathroom area ●
toilet now installed along with the heating vent – the heat source for
this is a fin-rad mounted on the opposite side of
the toilet wall under the desk and boxed in). More to come soon. |
|
Portholes
fitted 26 September 2006 All of the portholes have been fitted – this makes
a lot of difference to the external appearance of BELLE, we think that you
will agree. We are very pleased
indeed with the results. The
cabin wall panelling / beading has been started and circular
‘liners’ will be fitted to the portholes from the inside of the
cabin when this panelling / beading is complete. All of these liners have already been
made. Most of the ceiling lights have been fitted as have most of the boxes
for the 240 v. ac sockets. The
sockets themselves will be fitted soon, along with the light switches. All of the ceiling lights, sockets and
switches have a polished chrome finish.
The navigation lights have also been fitted and there has been a small
light positioned above the bow doors to illuminate the well deck and cratch
areas. Conventional panel type radiators have been fixed in the
saloon, under the desk in the day room, and in the utility room – there
will be a chrome finish towel radiator in the bathroom (delivered but not
fitted yet). There are Fin-Rads
fitted in the bedroom and in the toilet.
The shower base has been laid in the bathroom – the shower frame
will be built around this soon.
We will be having toughened / frosted glass panels mounted into this
frame. We have decided upon the
shower mixer taps / shower head to be used and the taps for the wash basin,
but not the wash basin design itself yet. The gloss black laminate has arrived
– this will find its way into the bathroom during this coming
week. Most of the saloon TV/CD
cupboard has been built ‘on the bench’ and this too will be fixed
into the saloon during this coming week. |
|
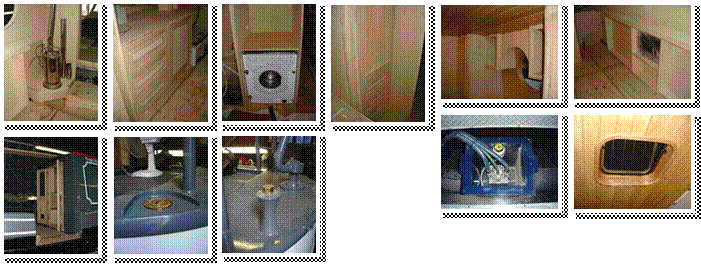
Mocking-up in
all rooms nearly completed 19 September
2006 Whilst there has been a lot of wiring and piping and
fitting of the main engine and some auxiliary items going on for the last six
weeks or so, most of the fitted furniture in each room has only been
mocked-up. The idea behind this
mocking-up is that it has allowed us to consolidate all of our thoughts and
plans in such a way that we achieve the layout we really want. We have indeed taken several
opportunities to make some slight adjustments to the layout in order to
improve things. Nevertheless, we
do not mind admitting that this has been a frustrating period for us, what
with seeing so much stuff going on generally but very little actually
finished. During the next few
weeks, we shall see all of the mocked-up furniture converted into the real
McCoy. This is just a selection of pictures of the partially
completed furniture and a few other items. Starting from top left and going clockwise
>>> the Refleks stove in the saloon, the desk unit in the day room,
the washer/dryer in the utility room, one of the wardrobes in the bedroom,
the cupboards above the head of the main bed, the cupboard that runs along
the port side of the saloon with the main TV in it, one of the Houdini
hatches, the bow thruster motor installed into its removable housing, one of
the fuel tank breathers, one of the fuel tank fillers and the stable doors at
the bow. More to follow soon. |
|
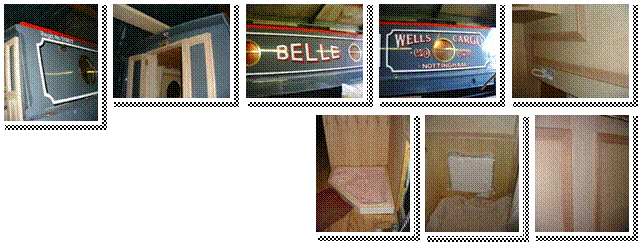
Livery lines
and bow pattern painted and waste tank fitted 26 July 2006 Most of the livery lines have been painted as has the
fancy pattern around the bow – we are very pleased indeed with the
results. Gary and Mark will now
paint the stern hatch and the stern doors using similar lines. We decided to do away with the idea of
painting livery lines on the cabin side doors because we think that this will
be a bit OTT. Note the brass
thrust washers on all of the cabin door hinges – a nice touch and better
than having steel-on-steel grinding away. These brass washers can easily be
replaced when they are eventually worn down to the extent that the bottom
edges of the doors are fouling the bottom edges of the door apertures. We have a bit more brass in the form
of the water tank filler (well every bit counts at this stage you know!)
– this filler has been located in the top of
the gunwale at the bow end of the port cabin wall. The waste tank has been fitted into the floor space in
the stern. This tank is
‘T’ shaped and as big as we can get into the available
space. We have not calculated the
capacity of this tank, but we will do so after our next trip (if we can
remember to take some measurements this time!). The Important thing to note is that
the boat will stay in ‘trim’ as the waste tank fills because the
waste will be more or less evenly distributed throughout the tank. Sand/paint mix has been applied to the
gunwales and the stern deck (so as to reduce the risk of slipping when
walking in these areas) – sand/paint mix will also be applied to the
cabin roof. Those of you familiar with the Sandhills boat building
team will be pleased to learn that the ‘head cleaner’ [not the
one peering through the side doors!] is still alive and well and still doing
a good job in and around the boat, although looking a bit redder than usual
owing to the heat wave. |
|
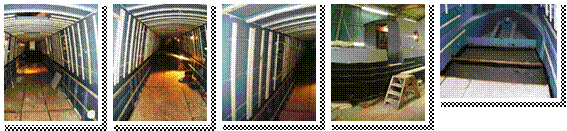
Top coat
finished, lining out started and temporary bulkheads erected 12 July 2006 There are now five top coats over the five layers of
undercoat – look at that shine; you beauty! There are still a few edges to be
tidied up, but they will all be sorted soon. The differences in the shade of grey
are due to the artificial light in the workshop (at the bow end) and the
natural light shining through the workshop doorway onto the stern. Next job will be painting the livery
lines – these will be arranged so as to form several ‘panels’
on each side of the cabin wall using a combination of a 1” wide artic
white line, a ¼” gap and then a ¾” wide black line,
so as to create a shadow effect.
The red tape you can see in the pictures was used to help us visualise
and agree where the livery lines will be positioned. All of the corners of the panels
formed by these livery lines will be scalloped. Pictures coming soon. The lining out has been started and temporary bulkheads
have been erected to confirm that the layout is as we want it. Gary and Mark even knocked-up a
temporary loo for us so that we could judge the elbow room available in this,
the most important room in the boat! |

|
Spray foamed
and undercoated on 14 June 2006 The interior of the cabin has been spray foamed,
including all surfaces under the well deck, but excluding the engine bay
– the foam is around 30mm thick for the most and it has been
‘shaved’ back where necessary to expose the battens ready for
fixing wall and ceiling timbers.
The 150 gallon fresh water tank is standing upright waiting to be
fitted under the well deck. The
exterior of the cabin has now received five layers of grey undercoat (hand
painted). The hull sides have
been sprouting stand pipes here and there, along with some holes for various
services. |

|
Battening out,
ballasting and first layer of flooring laid on 31 May 2006 The bilge has been wax-oiled throughout and the concrete
slab ballast laid between the floor bearers –
the slabs are laid on top of treated timber slats so that they do not make
contact with the steel base plate.
The first layer of flooring timbers has been laid on top of the floor
bearers. The last two sections of
the floor area at the stern have been left clear of ballast / timber ready
for the toilet waste tank. Timber
battens have been fixed to the cabin sides / roof – there are still a
few more battens to be added, but this job should be finished ready for spray
foaming 05 June 2006. The
removable gunwale sections have been removed from the bow – this makes
access a lot easier. Apologies
for the poor quality of the photographs. |